Grand Canyon: Rim to Rim

Can I Hike Rim to Rim?

Well I can’t really answer that question for you, but I can provide you with the information you’ll need to answer it for yourself.

Bright Angel Trail looking to North Kaibab Trail

When I first came to do this hike I found it difficult to find the information I needed to do the necessary planning to make it a success. The information was out there but is gathering it was a challenge

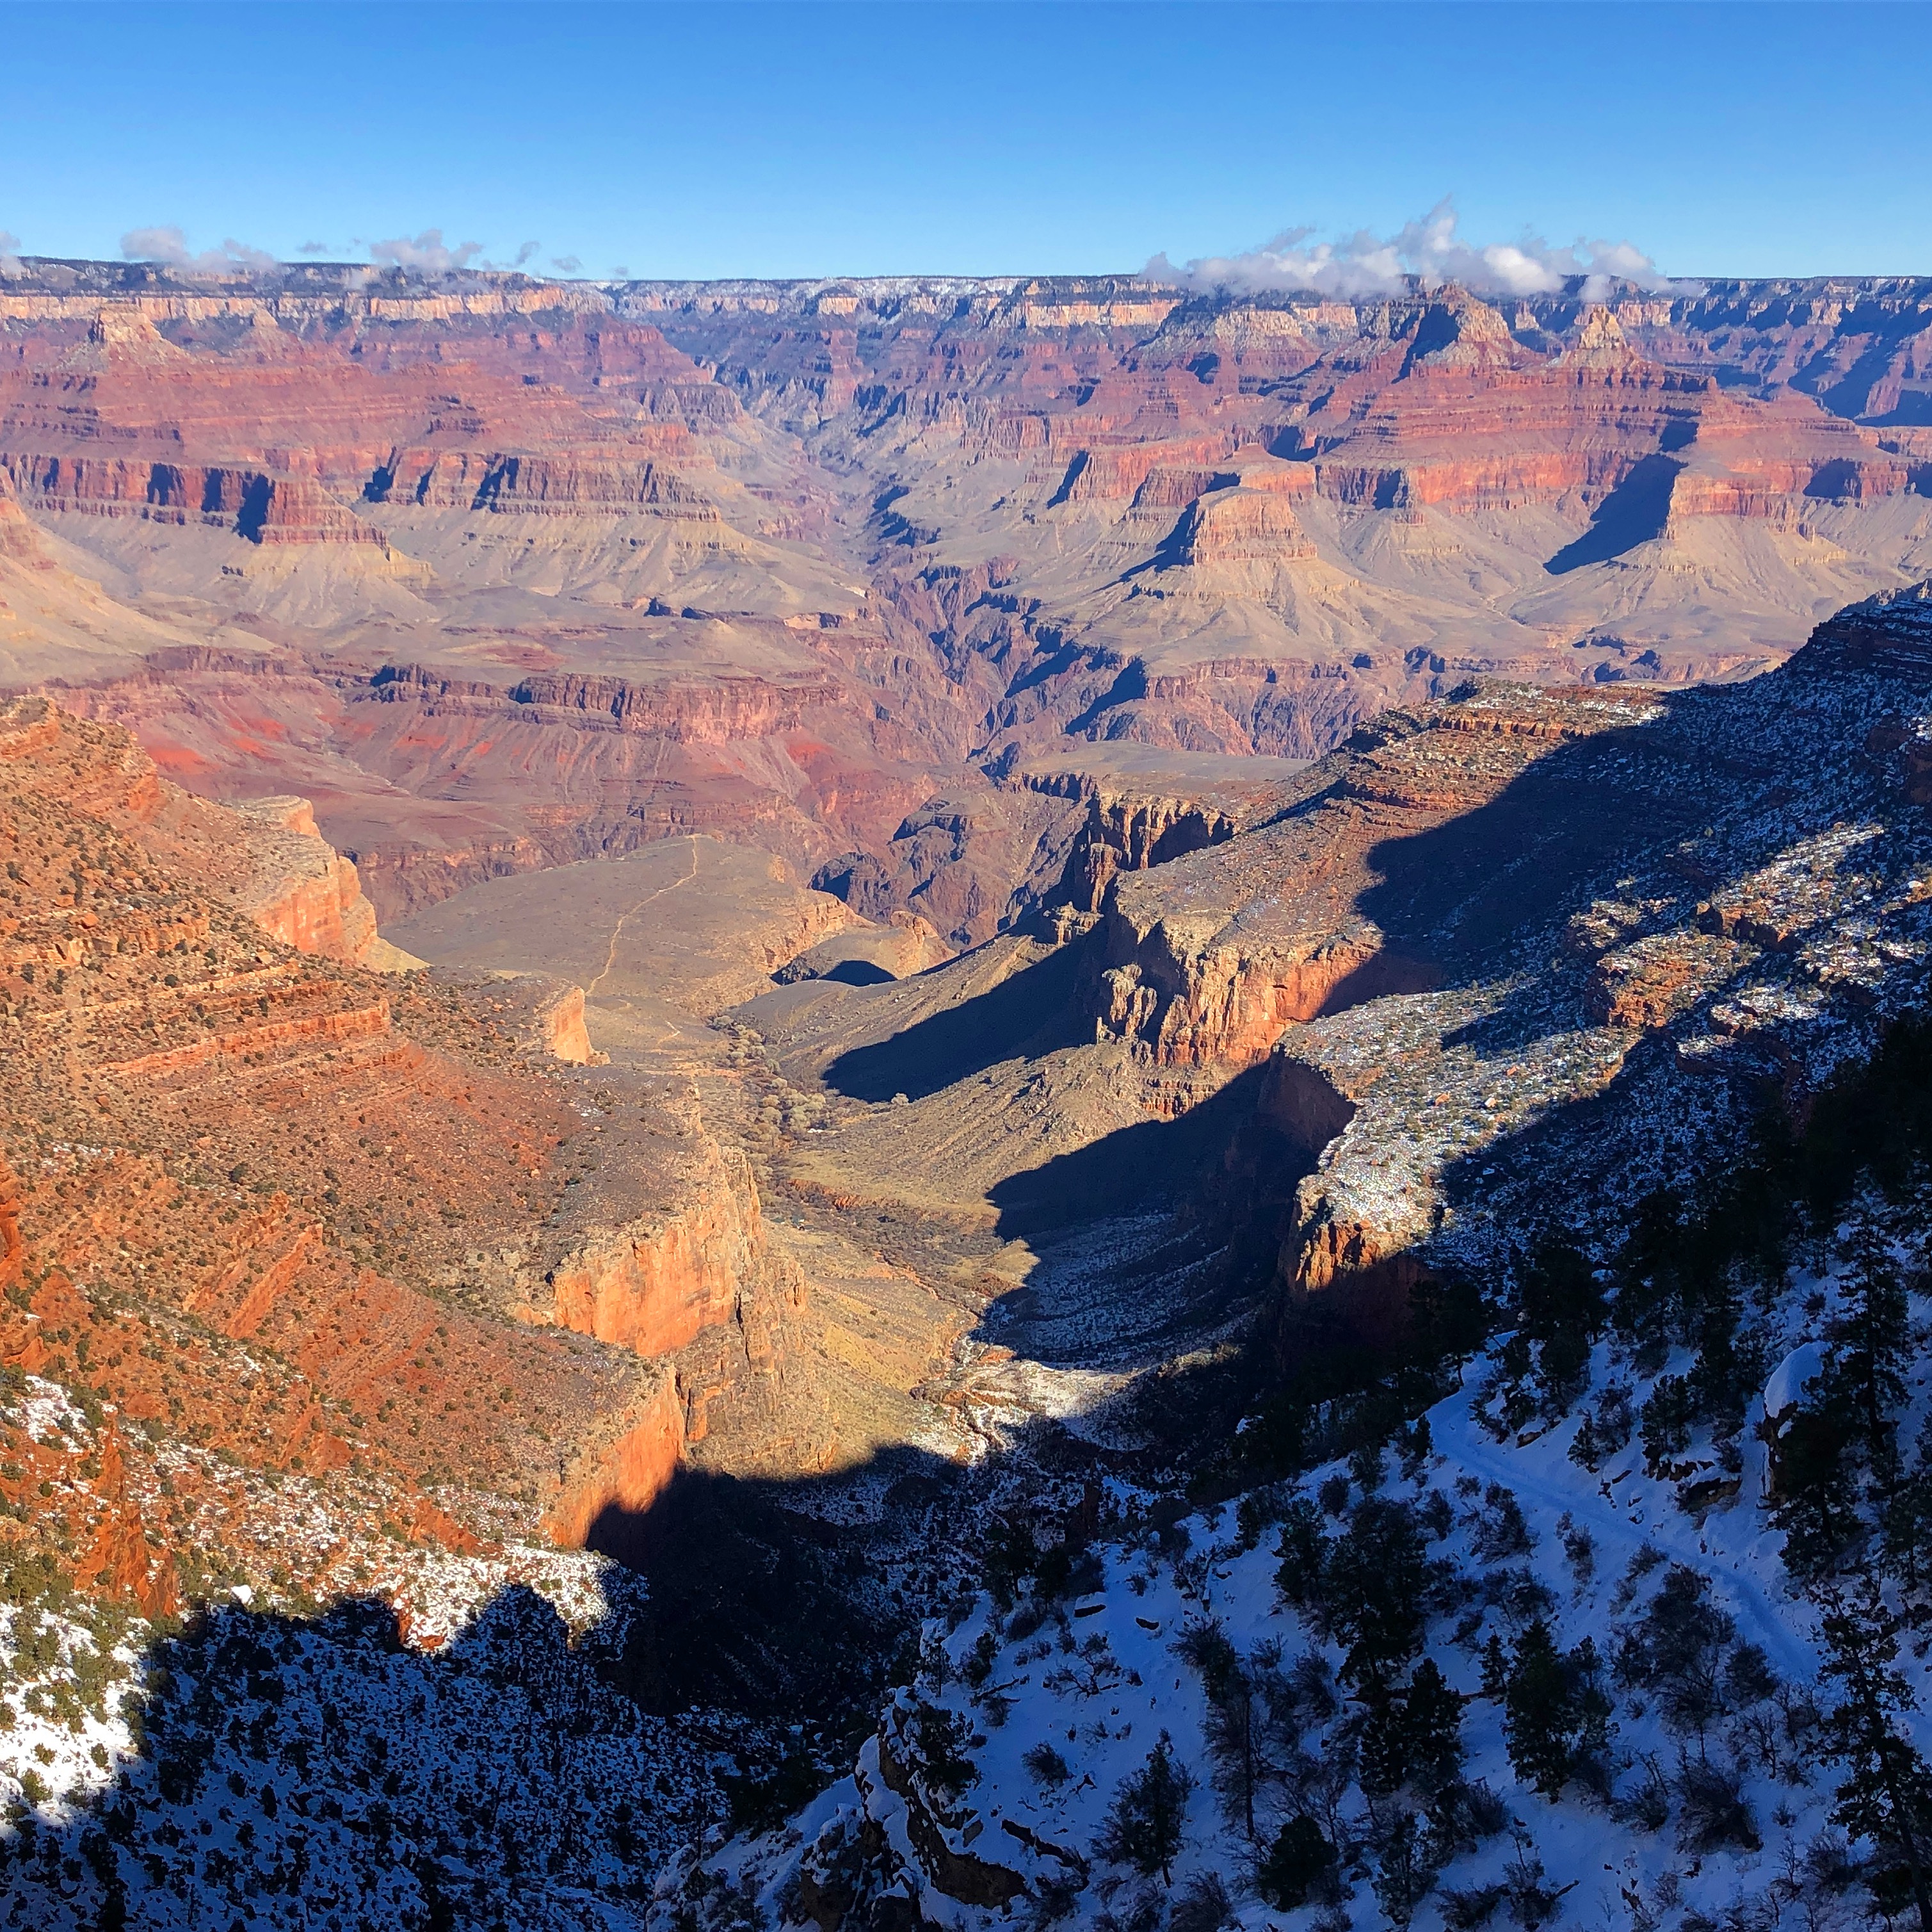
Grand Canyon Rim to Rim, (R2R), is a hike from the North or the South Rim to the opposite side.  As the crow flies, that’s about 10 miles.  According to the NPS however, on the hoof it’s 21 miles or 23.5 miles depending on your route. Click here for detailed distances and way-points. You’ll see different estimates of the distances, I’ve defaulted to the National Park Service data.

Some hikers take a few days to complete R2R and camp and / or lodge along the way.  To camp you’ll need a Back-Country Permit, to lodge at Phantom Ranch you’ll need a reservation. Both options will require advanced planning.  It can however be done in one continuous day hike, assuming you are both fit enough and prepared.  That is what is described here.

Routes:

In essence there are 4 options connecting North Kaibab Trail with either South Kaibab Trail or Bright Angel Trail. I’ve listed the ascent here rather than the altitude change, however it is worth noting that the descent can take a toll.

North to South Distance Ascent
North Kaibab to South Kaibab 21 miles 4860 ft North Kaibab to Bright Angel 23.5 mile 4460 ft South to North South Kaibab to North Kaibab 21 miles 5850 ft Bright Angel to North Kaibab 23.5 miles 5850 ft

Pros and Cons

  • North to South is a bit easier, you have at least 1000 ft less to climb than South to North
  • Getting to the North Rim for a reasonable start time can be logistically challenging
  • In terms of terrain, North to South is a long descent and short ascent
  • Bright Angel is longer than South Kaibab but tends to be more gradual.
  • South Kaibab tends to follow a ridge so views are expansive but it is steep, there is little shade, and no water.
  • Bright Angel has both seasonal and perennial water sources and more shade

How long does it take? Of course this depends on how fit you are, how fast you walk, and how often you stop. Each time I’ve completed the hike the time has been somewhere between 9 hours and 11 hours. The 9 hour time was a North to South hike. I wasn’t aiming to break any records but I wasn’t hanging around much either.

Should I train for R2R? I would recommend it. My most comfortable and enjoyable R2R experiences have been when I made special effort to get physically ready. For me that included a regular hiking plan at altitude that included time and distance goals. It makes a difference.

North Rim access.  First things first.  The North Rim lodging and restaurants and some Ranger Services close from October 15th to May 15th.  The North Rim is still open for day use (dawn till dusk) through November 31st unless snow closes the road before that date.  So it is possible to do R2R between Oct 15th and Nov 31st but you are dependent on the weather conditions to allow you into or out from the North Kaibab Trailhead on the North Rim.

There is no real need for route finding on R2R corridor trails. All routes are maintained and clearly marked. The descriptions here are to help you know and visualize what to expect.

Bright Angel Trail starts from Grand Canyon Village by the Kolb Studio. South Kaibab Trail starts off the Yaki Point Road. You can’t take your car there but can take the South Rim Shuttle there for free or walk the Rim Trail from Mather Point Parking Lots. North Kaibab Trailhead is just over a mile from Grand Canyon Lodge, less than 1 mile from the Campsite. The mule trail / bridle path will take you there.     

South Kaibab

Cedar Ridge from Ooh Aah Point

This is the steepest of the two “corridor” trails from the South Rim to the river. It starts with a tight series of switchbacks  down off the Rim leveling out to Ooh Aah Point,  about a mile from the trailhead. From here you can view the middle section of the trail from Cedar Ridgeonto the east side of O’Neill Butte and the switchbacks from Skeleton Point around the east side of Natural Arch and eventually round to The Tipoff. You’ll find restrooms at Cedar Ridge and The Tipoff

SK down to the Tonto Plateau

At The Tipoff the South Kaibab Trail junctions with the Tonto Trail, which on another occasion can take you to Indian Garden and Bright Angel Trail for a nice and challenging horseshoe hike from the South Rim. You’ll also find an emergency phone at The Tipoff.

Colorado from Black Bridge, SK Trail

From The Tipoff the trail begins a convoluted mile and a half of switchbacks and traverses down to The Colorado. On the descent there is a spectacular view of the river, the Silver Bridge on Bright Angel, and the Black Bridge that you will take across to Bright Angel Campground and the North Kaibab Trail


Bright Angel

Bright Angel benefits
from more shade than the South Kaibab , a more forgiving terrain, and 3 water supplies, (2 seasonal and 1 year-round). It is also 2.5 miles longer.

Bright Angel to Indian Garden and beyond

The trail starts east of Hermit’s Rest Shuttle stop near Kolb Studio and begins a long series of switchbacks, at times sweeping and at times tight. The first way-point is 1.5 Mile Resthouse. Here you’ll find water, (seasonal), an emergency phone, and a restroom. Switchbacks continue to the second way-point at 3 Mile Resthouse.

From 3 Mile Resthouse the trail descends the Redwall in a series of switchbacks known as Jacob’s Ladder before opening up and following the route of Garden Creek down to Indian Garden. Here there is a Ranger Station, campground, water and restroom, and shade provided by the sprawling Cottonwoods.

You’ll pass junctions with the Tonto Trail, west out to Plateau Point and east to The Tipoff on the South Kaibab. The trail follows Garden Creek before heading eastwards to the Devil’s Corkscrew – a set of switchbacks that take you down to Pipe Creek. The trail follows the course of Pipe Creek, joined by Garden Creek, down to the Colorado.

From here you follow the River Trail upstream and above the river for a mile or so to the Silver Bridge and across to Bright Angel Campground and the North Kaibab Trail

North Kaibab

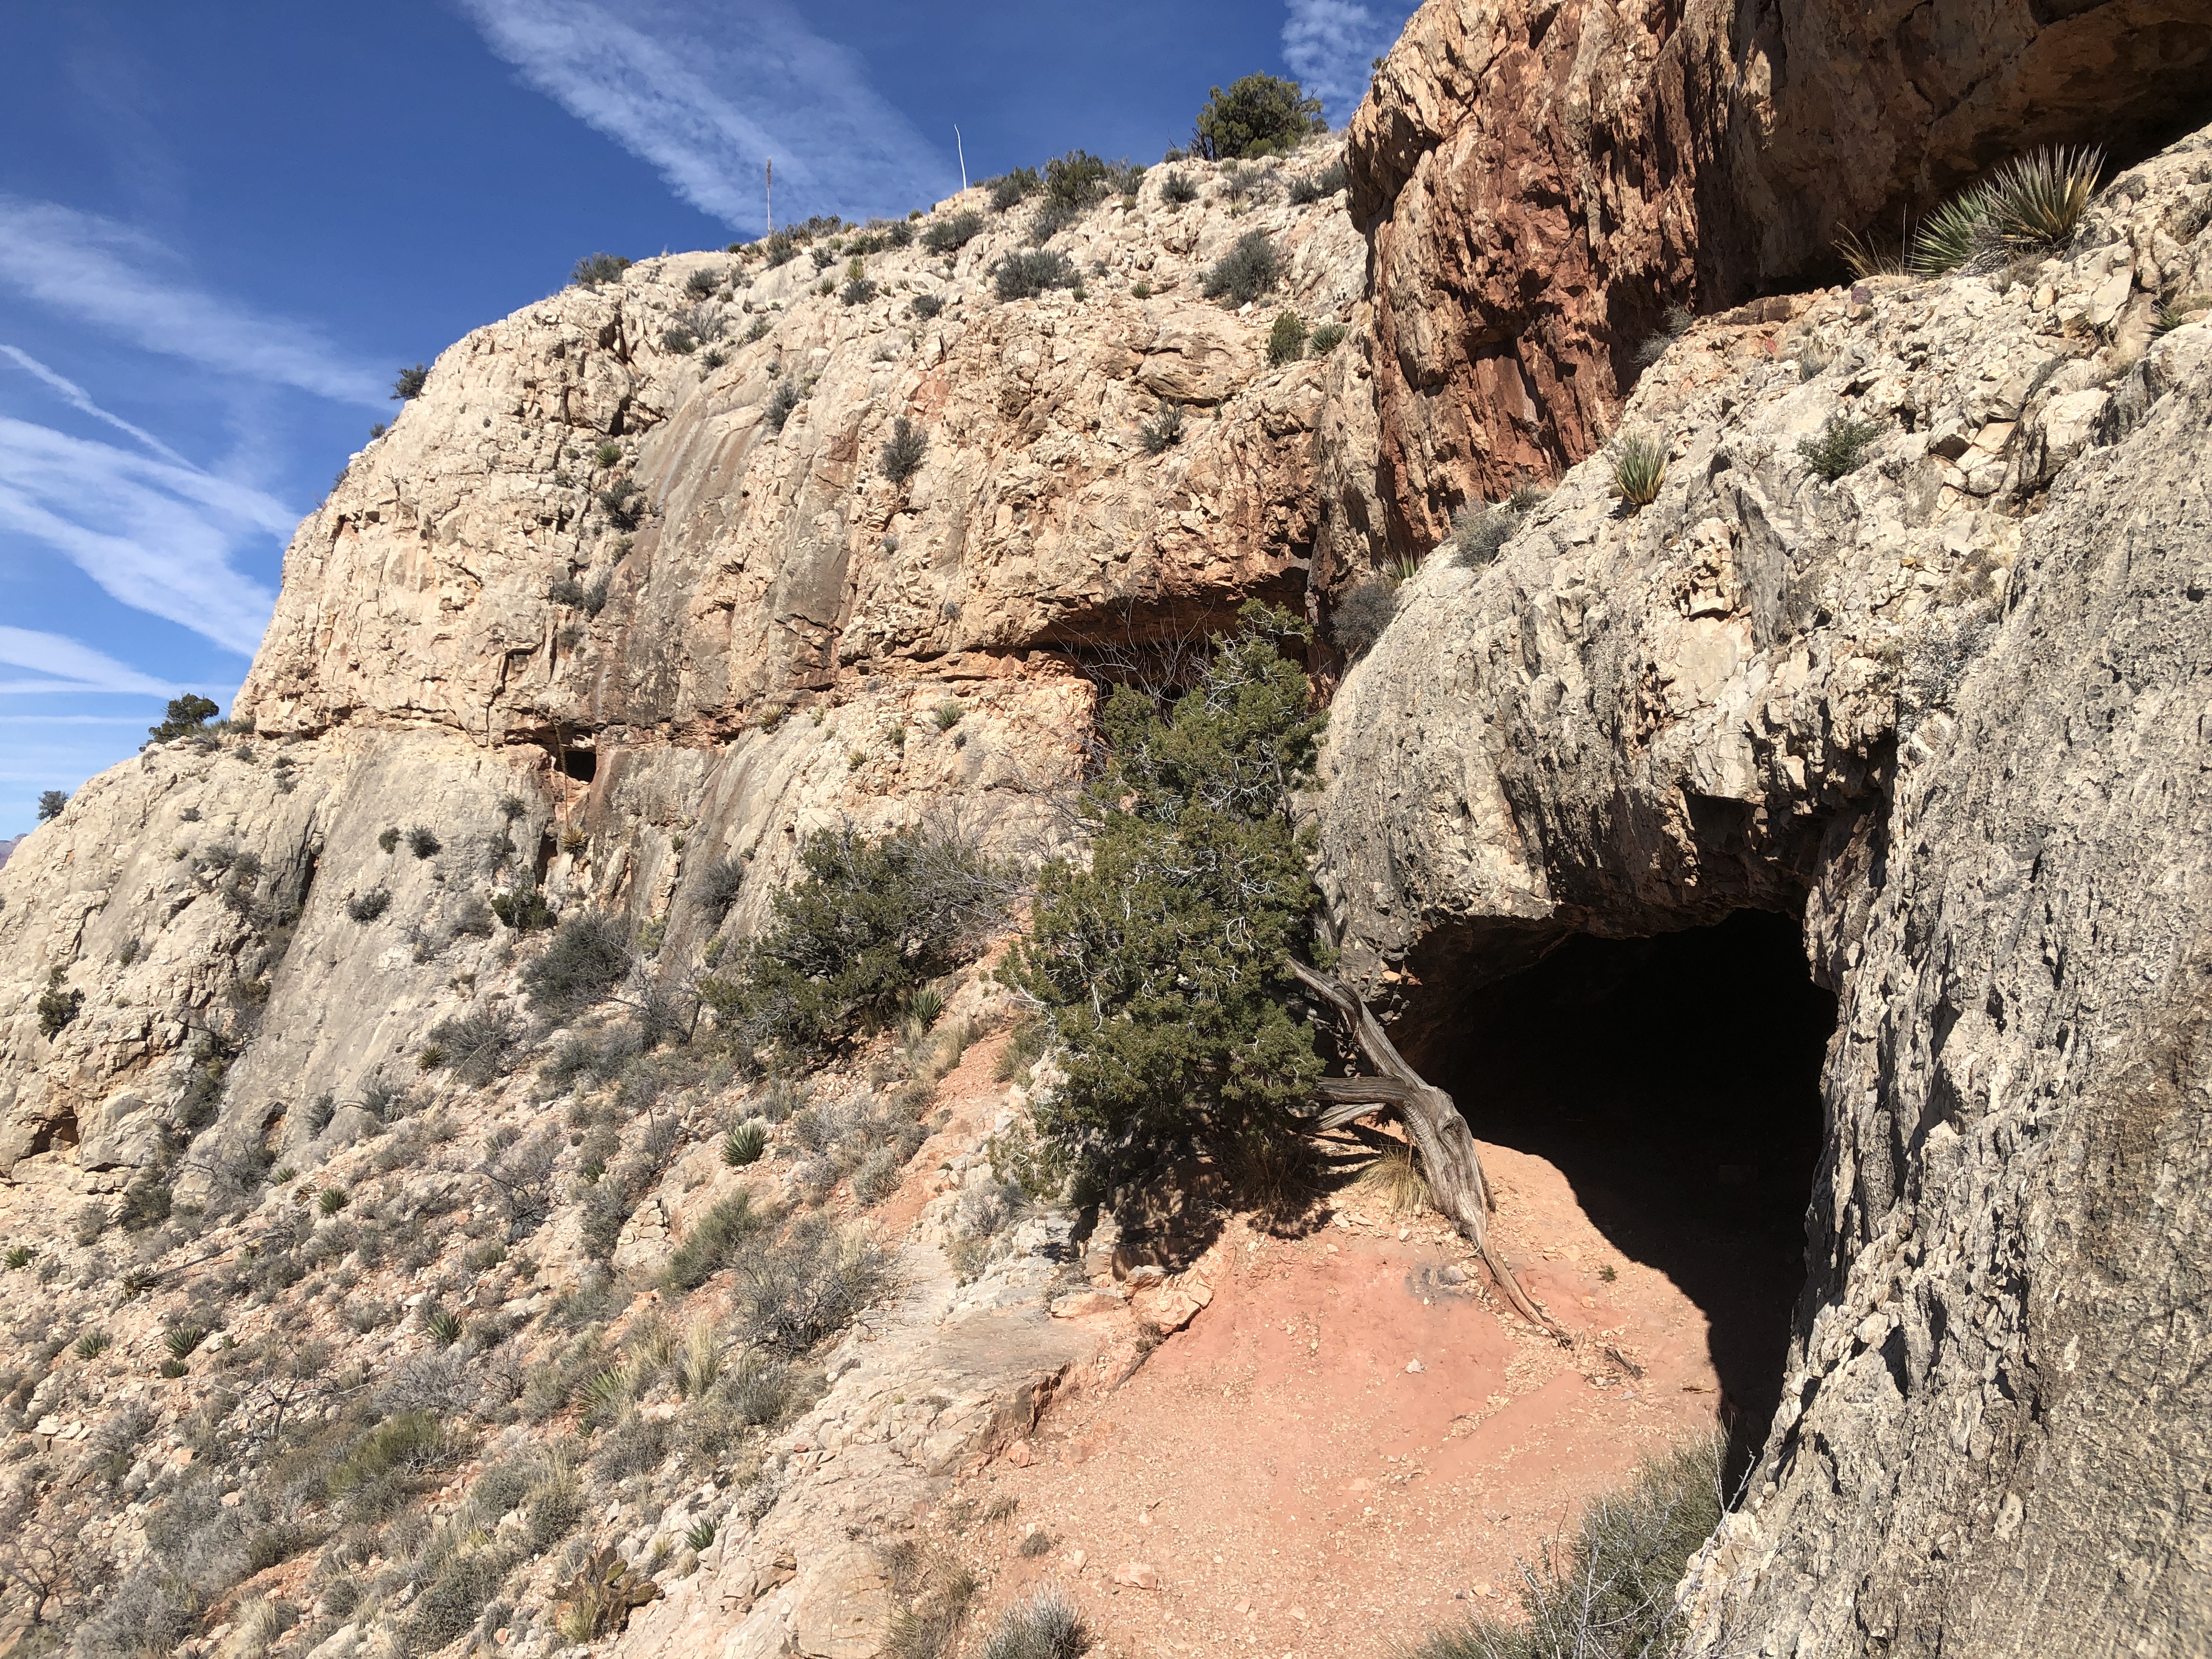
With River Runners, campers, hiking groups, mule riders, and lodgers at Phantom Ranch, the first stretch of North Kaibab can feel a bit crowded compared to the rest of the trail. However there is the opportunity to replenish water supplies, take some shade, and get some snacks from Phantom Ranch Canteen

Roaring Springs Canyon, NK Trail

As you exit from The Box the canyon opens up and in general keeps a gradual and easy ascent up to Cottonwood Campground. About a mile and a half short of Cottonwood is a spur trail to Ribbon Falls. If you have the energy it’s hard to resist this short diversion, adds about a mile in total to the Rim to Rim.

After leaving Phantom Ranch you’ll pass the junction with Clear Creek Trail on the right before entering The Box. This narrow, high-walled section of the trail follows Bright Angel Creek as it cuts it’s way through a gorge and provides much appreciated shade.

Head down from Cottonwood

Cottonwood Campsite is a great place to fill up your water bottles or bladder and take a break. Much less busy than Phantom Ranch and has a number of little nooks and crannies where you can find shade and a bench to rest on. There is also restrooms and an emergency phone.

From here you have a mile and half to the next water supply at Pump House Ranger Station and the junction with the Old Bright Angel Trail (not recommended as part of R2R).

It is around a half mile to the spur trail to Roaring Springs. I’ve never been inclined to take that diversion either going north or south.

The trail is now heading up Roaring Springs Canyon and 3 mile climb to the next water source at Supai Tunnel. Much of this stretch follows a ledge traversing the Redwall before crossing the canyon by footbridge.

This image has an empty alt attribute; its file name is echb1435.jpg
Looking down Roaring Springs Canyon

As you pass through Supai Tunnel the trail begins to get a bit busier with day hikers from the North Rim. From here you meet a series of switchbacks for just over a mile and a half. You’ll see the white of the Kaibab Formation getting ever closer.

Heat Average temperatures at the top: 48°F to 83°F (9°C to 28°C) Average temperatures at the river: 74°F to 104°F (23°C to 40°C); temperatures can feel like 140°F (60°C) in the sun and reach 115°F (46°C) in the shade.

Source NPS Hiking Into Grand Canyon

These are the average highs. It can and does get hotter

How much water should I carry? I suppose the question really is how much water should I drink, but to drink it you need to carry it. It is critically important to stay to avoid dehydration and loss of electrolytes through perspiration. On my first R2R I carried 6 liters of water, (2 X 3 liter bladders), and 2 liter bottles of Gatorade. Very heavy and turned out more than I needed. I made it to the river, (down SK), on less than 3 liters and filled up at the faucet there. That got me to Cottonwood where I refilled. I topped up at Pumphouse and Supai Tunnel. Since then I’ve carried 3 liters of water, 1 liter Gatorade and a supply of electrolyte tablets. I still drink the same amount, around 12 liters, (just over 3 Gallons). Regarding how much you should drink, it is imperative to “know thyself”. Hedge on the side of too much, you might meet someone who will thank you for it.

Logistics

Ideally you will have someone who is there to drop you off and pick you up. However if you are on vacation and don’t have that luxury, how do you get to your trailhead of choice? And how do you get back to your car?

The most popular options are:

  • Leave you car on the South Rim and take a shuttle to the North. This is a 4 hr 30 min drive. The current schedule gets you to the North for 12.30 pm or 6 pm. Neither ideal starting times. Hikers get around this by booking North Rim accommodation or camping and setting off in the morning. There is a Hiker / Biker section to the campsite on the North where you are likely to squeeze in. Check with the Ranger Service.
  • Hike from the South Rim. Get lodging or camp on the North and take the shuttle back next day
  • If cost is not a consideration you can hire a private shuttle service to drop you off at a time that suits you.
  • Hike from South Rim to North, stay over and hike back the following day for a R2R2R hike. Some do that as a day and night hike!

So, can you hike Rim to Rim?

Tanner Trail to top of the Red Wall

Tanner Trail from the Rim in February

The Tanner Trail is a Rim to River trail.  If you are thinking of Rim to River and back as a day hike, it is an extreme challenge.  More so than the mileage might suggest.

In fact the mileage estimates from Rim to River on the Tanner varies according to source:

  • Sky Terrain Grand Canyon Map 7.8 miles
  • Grand Canyon NPS 9 miles
  • Hiking Grand Canyon NP Adkinson 7.6 miles
  • Hiking The Grand Canyon Annerino 10.4 miles

Taking the National Park Service guidance of 9 miles Rim to River, the route from Rim to the top of the Red Wall is at minimum a 7 mile round trip. However it does feel more.

The trail starts about 150ft before the parking lot at Lipan Point.  Park your car and follow the road back a short way and you’ll see a large Information Board just off the road on your left. This is the trailhead.

The trail starts gradually towards the edge of the Rim before dropping steeply in a long series of switchbacks down to the saddle between Seventyfive Mile Creek and Tanner Canyon. The saddle is in view below you for most of the descent.

Seventyfive Mile Saddle at bottom center

This first section is steep. The trail descends the east side of a gully before switching to the west side and working its way down. The trail is in decent shape but is a bit rocky requiring a wee bit of clambering in places.

assuming you’re not trying to break any records it should take you about an hour to get to the saddle.  Keep an eye out as you get close to the saddle, the trail drops down off the ridge into the wash on the right before rising back to the saddle.  If you miss this you’ll be forced to backtrack or do a bit of scrambling down off the ridge.

View down Canyon from Seventyfive Mile saddle

From the saddle Escalante Butte rises ahead of you.  The trail circles around the east (right) side of the butte before skirting the first of two bowls below Escalante and Cardenas Buttes.  I love this part of the trail.  Tanner Canyon really opens out, you can see the trail stretch ahead. You can really stride out here. There are also some perfect camping spots along the way.

Tanner Canyon opens up. The trail hugs the left side

According to Annerino, half hour scrambles from the saddle between them will take you up Escalante and Cardenas Buttes.  I scrambled up to the saddle and left it at that!

As you come out of the second bowl the trail rises slightly before dropping down a short section of switchbacks followed by a half mile stroll out to a stunning overlook, (see the short video below). This is your destination.

Colorado River from atop the Red Wall

You’ll see the Tanner Trail drop off to the right just before the overlook on it’s way to the river.

The river looks close from here – it’s not!!!  It’s at least another three and a half miles (possibly more) to the beach.  Assuming you’re coming back up, that’s a minimum seven miles to get back to where you are. Having done it, I can swear it feels a lot longer than the mileage suggests.

Walk up to the overlook

Grandview Trail: Last Chance Mine and Cave of Domes

View from the Grandview Trail

I’d never seen Grandview Lookout on the South Rim of The Grand Canyon deserted before. 8am. Friday, February 1st. there were no cars and no people. The lookout point was slick with ice, clearly in the freeze of a freeze – thaw – freeze cycle. I popped the microspikes onto my boots and hit the trail which makes its way into the Canyon directly below lookout point.

The plan: drop down Grandview Trail onto to Horseshoe Mesa, investigate the Last Chance Mine and ruins, check out the Cave of Domes, grab lunch at the west point of the mesa and head back to the rim…, and take the whole day about it.

Not to scale…
Snow covered Grandview Trail

There are many advantages to living in Northern Arizona. A key bonus for me is that I get to see and experience the Grand Canyon in all seasons. Today it was winter and the trail had a good foot of snow on it. The snowfall had come a couple of days earlier so thankfully I was not the first hiker to kick through it or to identify where the switchbacks switched back.

The initial set of switchbacks on the trail hug the cliff wall down off the rim and are a bit exposed in places. The odd protruding rock from the cliff may force you a little closer to the trail edge than you are comfortable with. The trail follows a traditional Native American route into the Canyon and was improved by miners to enable the mule trains to haul the copper ore from Last Chance Mine onto the rim. Some of the original trail woodwork from the mining days still exists!

As you leave the initial section of the trail it skirts along the side of a short ridge before dropping down a series of steep cobbled switchbacks to Coconino Saddle. This is about a mile down the trail and is a good place to stash some Gatorade for the return trip.

Leaving the saddle the trail curves north then east and a final set of switchbacks, (I generally don’t notice these till the way back up), before a long easy traverse / descent to the neck of Horseshoe Mesa.

As the trail opens up above Horseshoe Mesa there is a small rise just right of the trail. This is a good point to orient yourself:

  • The small red butte in front is on the curve of the horseshoe, the arms are facing away from you.
  • Last Chance Mine is down to the right
  • Pete Berry’s Cabin is front left
  • The trail to Cave of Domes is beyond and slight right at the cabin

From here the trail drops down to the 3-way junction between Cottonwood Creek on the left, Last Chance Mine and Page Spring on the right and Horseshoe Mesa and Cave of Domes ahead.

From inside one of the shafts of Last Chance Mine below Horseshoe Mesa


If you decide to take a look around the mine take care. The trail across is very tame before getting a bit sketchy, exposed, and very steep as it heads down to Page Spring and Hance Creek.

Leaving the mine, head back to the junction and make your way out towards the west arm of Horseshoe Mesa. Beyond the Cabin you’ll pass the sign to the Group Campsite on your right. If you have time and energy this trail would also take you out to the east arm of Horseshoe Mesa and a more secluded lunch. However if the Cave of Domes is your goal keep ahead.

The Cave of Domes is familiar to most Canyon regulars but is missed by most first time visitors. To find the the entrance follow the trail towards the west arm of the horseshoe. About five minutes beyond the red butte follow a wash, (dry stream bed), on your left. There are a few so you may need a little trial and error. The wash becomes a trail pretty quickly. If it doesn’t then make your way back and try the next?

Entrance to Cave of Domes
Entrance to Cave of Domes from inside

You’ll need a flashlight or head torch if you want to investigate the inside, (and a head for dusty, dark, and enclosed spaces). There is a lot to investigate. First time I was in I was with one of the National Park Service Rangers and did a good bit of climbing in beyond the first few halls. The next time I visited on my own I was less inclined!

View down the Canyon from Horseshoe Mesa

Back on the trail make a left and head out to the point of the west arm of Horseshoe Mesa. Keep on the Mesa plateau, there is a trail that drops down to the Tonto Trail on the right, this is best left for a day with less messing around. Out at the point is the most spectacular lunch spot and unrestricted view up and down the Canyon. With a glimpse of the Colorado and a bit of shade thrown in.

All that is left is for you to haul yourself back to the Rim.

Death By Canyon

So many ways to get yourself killed

I recently picked up a copy of Ghiglieri and Myers’ “Over The Edge: Death in Grand Canyon.” in a used bookstore in Flagstaff. When you come to the Canyon you’ll see this for sale everywhere. I thought I’d skim it for Canyon trivia and pop it back on the shelf. I found it difficult to put down. As awful as these accounts of Canyon fatalities are, some hit close to home. Anyone who has spent significant time hiking in the Canyon and has not subsequently questioned some of the decisions they have made are probably not being fully honest with themselves.

Some years ago in mid-summer I hiked Rim to River and back on the Tanner trail, about 15 miles round trip, (not recommended). That hadn’t been my plan! I was aiming for the top of the Redwall just beyond Cardenas Butte. When I got there it was still early and still relatively cool. I thought I’d get to the river and back above the Redwall before the hottest part of the day. I was wrong. I got to the river in about 2.5 hours. Spent some time there cooling of and replenishing calories. It wasn’t enough. As a result of dehydration, heat exhaustion and cramps, it took me 9.5 to get back to the rim. I had the luxury of that becoming a lesson and not a personal tragedy. I might write it up some day when I get over it. I’m not there yet.

The book

The odds are in your favor

According to www.mygrandcanyonpark.com you have a 1:400,000 chance of dying in or around the Canyon when you visit! Good odds for most of us it would appear, 6.25 million of us visited the park in 2017. In fact it’s not something most of us would even consider, at least not for ourselves.

The first question most Park Rangers get is “How many people die by falling into the Canyon?”. There is no answer to this, it varies year to year. On average around 12 people die, (from all causes), in the National Park each year. This figure includes traffic accidents, medical problems and suicides as well as falls and heat and cold related deaths.

According to Ghiglieri and Myers’ the odds of you dying on your visit are increased considerably if you venture into the Canyon itself. In their excellently researched, written, and surprisingly readable book you’ll find everything you ever wanted to know, and probably didn’t want to know, about death and dying in the Grand Canyon

Sorry guys!

By far the the biggest cause of death in the Canyon is being Male. Being young also helps. Of course there are fatalities among both genders and a wide age range but being young and male increases your likelihood of death considerably. Many of the fatal falls from the rim of the Canyon result from an apparent disregard for safety: climbing the barrier; goofing around; posing for photos; and jumping across rocks have caused almost all rim fatalities.

The Disneyfication of the Park in the minds of visitors appears to lead us to assume an illusion of safety that does not actually exist. If millions of people visit then it must be safe, if thousands hike it it cant be dangerous. This attitude is probably more prevalent amongst those visitors who stay on the rims that in those who hike into the Inner Canyon, yet their are enough reports from accidents occurring in the hiking fraternity to recognize that an underestimation of the dangers inherent in an environment like the Grand Canyon is not uncommon in those of us who drop below the rims. This is a major misconception.

Of the causes of fatal falls from the Canyon rim and within the canyon “Bad judgement ranks at the top”, (Ghiglieri and Myers). Nearly all victims have demonstrated a serious lack of judgement prior to their accident. Again more so amongst younger males than other groups.

Stick to the plan

Taking shortcuts off the main trail to try to reduce the mileage or the effort require to get to a destination has resulted in hikers getting lost, disoriented, further from their destination, and getting themselves into climbing situations they are neither equipped for nor able to manage.

Seriously, how hot can it get?

Slips, trips, and fatal falls may grab the news but the desert environment of the Canyon can be a killer. In winter it can get extremely cold and in summer unbelievably hot. Since most hikers visit in the summer months lets focus there. Heat is a killer, dehydration and heatstroke are major causes of death in the Canyon in summer.

While a summer morning temperature on the rim may be a pleasant 70f it can get to 120f in the Inner Canyon a little later on the same day. For those who have not experienced that heat, it is almost impossible to imagine. It is surrounding, you feel it all over not just from above. Even though shade will provide some relief the temperature can still be astounding and debilitating. As surprising is the quantity of water required to function in this environment. It would not be unusual to sweat a quart, (close to a liter), of fluid and electrolytes each hour hiking in the heat of the Canyon. Hiking uphill you can double that. Hikers should carry (and drink) upward of 2 Gallons of water and electrolyte mix with them for each day’s hike (around 17 lbs or 7.5 kgs in weight). That weight puts a lot of people off, it shouldn’t.

Upside down mountain

Most hikers are used to hiking hills and mountains. You get the hard work over on the way out. The price you pay for a good lunch with a good view is the effort you put in to get there. You then hike back down with your hands in your pockets and whistling Bob Dylan tunes. Those not fit enough to make the summit, in general, turnaround where they need to and get back down. Hiking from the rim into the Canyon is the opposite. You do the whistling on the way out and pay the price on the way back. As obvious as this would appear, it catches thousands of hikers out each year. Hikers often underestimate the water required, effort required, and impact of the heat on their performance. As a result suffer heat related illnesses such as dehydration, heat exhaustion, heat stroke and in some cases death!

Good point…

You’re on your own

Most hiking related deaths in the Canyon happen to Solo hikers. Partly this is because there is no one there to help or raise the alarm if you get into trouble and partly it would seem that when there is no second voice in the conversation we are more likely to make dumb decisions. On our own we are more likely to try the shortcut, hike down the wash, scramble up the ridge, than we would if there is a critical or questioning companion with us.

So how do we minimize the likelihood that we’ll appear in future revisions of Ghiglieri and Myers’ “Over The Edge: Death in Grand Canyon” ?

  • Make a Plan and stick to it
  • Know how far, how hot, how steep etc.
  • Take enough water and electrolytes
  • Know your capabilities and stay within them
  • Train for the trail
  • Keep to the trail
  • Hike in the morning and evening
  • Hike with others where possible

What the hell next?

I haven’t even mentioned lightning, flash floods, mountain lions, or snakes

Podcast on hiking the Canyon safely

A First Look at the Trails

As usual I’m itching to get past the introduction and get to the trails. I have the same itch when I’m in the trailhead parking lot – a desperate need to get on the trail. Admittedly I have left many a needed item in the car as a result, (matches, hiking poles, sunglasses, hat, gloves etc.). I’ve also taken the wrong trail in my general agitation to get started, more than once! So I’ll take a deep breath and slow it down just a bit.

Here is what we’re doing today:

  • Take a look out from Shoshone Point
  • Take a look into Hermit Trail
  • A peek at Bright Angel Trail
  • An Ooh Aah view from South Kaibab Trail

We’ll start at Shoshone Point on the South rim of The Grand Canyon. This is one of the only points within the accessible section of The National Park where you will get away from the crowds without dropping down into the canyon. It is an awe inspiring overlook that gives you unrestricted views west, north, and east. It should not be missed. If so spectacular then why so quiet? Couple of reasons: it’s not on the Park Service map; and it requires a walk of a mile or so to get there.

Heading east on Desert View Drive (Route 64) from Grand Canyon Village you’ll see, (or miss), a small parking lot on the left around Mile 446. The trail, a Jeep trail, passes a gate that states permits are required. This is only for group use and/or to drive the mile to the point. You can walk in without a permit. Follow this for about a mile till you reach a picnic area with a toilet. Pass through this to the point itself. Carefully make your way out past a standing rock to the most jaw dropping view you will likely ever see!

If you are lucky, or unlucky, you may come across a wedding or other ceremony. People can book the picnic area which has a number of open and covered tables. You still have access.

A short drop into Hermit Trail to get a look at the trail and the view. This trail is the furthest west in the main section of the National Park. You can drive there in the winter months but must take the shuttle service the rest of the year, (unless you have a Backcountry Permit).

An apt warning

The Hermit Trail will take you down to the river but at 8.5 miles one way that is too much for a dayhike for most of us. Instead, a trip down to Dripping Springs (1.8 miles one way), or to Santa Maria Spring, (2.3 miles) is more manageable.

We’re just having a quick look at Bright Angel Trail today. Even in January there is a steady stream of hikers and intrepid tourists. The trail drops of the rim in a beautiful series of gently sweeping switchbacks. Very quickly you will pass through a tunnel cut through the limestone. As you pass through have a look up at the rock face above on the left and you’ll see red pictograph created by the Havasupia. Beyond the switchbacks the trail traverses the canyon side to reach Mile-and-a-half Resthouse.

Switchbacks

The trail will take you to the river or if you want to make a horseshoe hike you can combine Bright Angel with Tonto over to South Kaibab and back to the South Rim. We’ll do that a little later in the year when there is more daylight

Down to Ooh Aah Point on South Kaibab Trail.  The trail follows a tight series of switchbacks before traversing the north cliff down to Ooh Aah Point. As the name suggests, the views here are stunning. With your eye you can follow the trail down another series of switchbacks to Cedar Ridge, along the east face of O’Neill Butte before plunging again. Before reaching the river, (a very long way away), you’ll pass Skeleton Point, the junction with the Tonto Trail, and the Tipoff. For unrestricted views within the Canyon it is hard to beat the South Kaibab Trail.

Hiking in The Grand Canyon: an Introduction

Are you planning to hike The Canyon? If so, you’re in the right place for some local knowledge. Whether it is your first time – that once in a lifetime trip, or if you are returning, this blog will give you the information you need to make your experience the best it can be! That’s my purpose, that and having a blast along the way.

Initially I’ll provide an overview. I want to give you an idea of what to expect, a grounding. That will be this post. I’ll then dig a little deeper and take you down specific trails and provide detailed information on what you can expect to see and experience. I’ll also provide current and local knowledge, tips, and the odd reference or two that will make life easier.

A view into the canyon from Shoshone Point on the South Rim

Lets start with some numbers. In 2017 6.25 million people visited The Grand Canyon Nation Park. Let that sink in. It’s greater that the population of Scotland. The park boundary starts at Lees Ferry and ends at the Grand Wash Cliffs. That’s a cool 277 river miles long. It gets to 18 miles wide, (it’s more typically 10 miles from South to North Rim), and it’s a mile deep – that’s a vertical mile, not a trail mile!

Where do most visitors go? They go to The Grand Canyon Village and Visitor Center and the many spectacular look out points accessible by car or Shuttle Bus on the South Rim. Some hike along The Rim Trail and fewer again hike down a small part of the trails into the Canyon and back. Where do most hikers go? They hike down and up the “Corridor” trail system, (I’ll come back to this in a second).

So we have a vast and wonderful expanse that most people don’t visit and that has a trail system that allows us to explore the inner canyon from both the South and North Rims. Let’s get started!

There are seven main trails from the South Rim into the Canyon. The trails, west to east:

  • Boucher Trail
  • Hermit Trail
  • Bright Angel Trail
  • South Kaibab Trail
  • Grandview Trail
  • New Hance Trail
  • Tanner Trail
A look into some trails

We’ll start with the Corridor. This consists of three main trails, two from the South Rim: Bright Angel Trail and South Kaibab Trail. One from the North Rim: North Kaibab Trail. These trails are the main arteries from the rims to the river and for those who want a challenge they provide the routes from Rim to Rim (R2R). There is a suspension bridge and the foot of both Bright Angel, (Silver Bridge), and South Kaibab, (Black Bridge), that take you over the Colorado to the North Kaibab.

Corridor Trails to the Colorado and R2R

Bright Angel Trail is the Park’s most popular trail for a number of reasons: the trailhead is in Grand Canyon Village therefore easily accessible; the switchbacks on the initial descent, (and eventual ascent), are relatively forgiving; there are several obvious destination points with Summer drinking water; it has an oasis and campground at Indian Gardens; it follows a canyon so typically has shade; and it is a spectacular trail with spectacular views.

South Kaibab Trail is the shortest route to the river, not the easiest. It is steep and open, it follows the crest of a ridge for most of it’s distance. Other than early morning, that means exposure to the sun for most of the trail. There is no water on the South Kaibab until you cross the river at the bottom – just short of 7 miles and just short of 5000ft descent. I’m underselling it, I love this trail, the views are overwhelming. There are a couple of obvious turnaround points for a dayhike: Cedar Point, Skeleton Point, and The Tipoff.

I’ll hike down both these trails and the others from the South Rim before digging a little deeper…

Patrick

References I use.

  • Grand Canyon National Park. Sky Terrain Maps, 4th Edition
  • Hiking The Grand Canyon. John Annerino. The Sierra Club
  • Hiking Grand Canyon National Park. Ron Adkinson. A Falcon Guide